Create your Blockchain DApp with Ethereum and VueJS – Tutorial Part 2
In the second part of the tutorial we are going to develop the front-end and see how to interact with the smart contract developed in the PART 1.
If you missed the introduction and you want to know what this tutorial is about, please read the intro.
In this part we are going through the following topics:
- Set up of the Vue project and Web3.js installation.
- Project set up and structure.
- The BcExplorer class: Web3.js made easy.
- Let’s start with the project! The main.js file.
- The main page app: App.vue
- The mixin mixinViews.js
- The TopMenu component.
- The view components:
Set up of the Vue project and Web3.js installation
For the set up we are going to use Vue command line interface (Vue CLI): if you have not installed it yet here you can find the commands
$ npm install -g @vue/cli
$ npm install -g @vue/cli-init
Then type the following command to check if everything was installed correctly:
$ vue ––version
Now let’s create a new project with the following command (you can create the project in any folder you want):
$ vue init webpack app-users
This command will start a wizard, which will ask you for general information like the app name, contact and description (just press enter).
On the question Install vue-router type Y for yes; type N for the questions:
- Use ESLint to lint your code?
- Set up unit tests
- Setup e2e tests with Nightwatch?
? Project name apptest
? Project description A Vue.js project
? Author
? Vue build standalone
? Install vue-router? Yes
? Use ESLint to lint your code? No
? Set up unit tests No
? Setup e2e tests with Nightwatch? No
? Should we run `npm install` for you after the project has been created? (recommended) npm
Once the installation is done, go inside the folder of the project which has just been created:
$ cd app-users
And let’s pull into the project the latest stable release of Web3.js (at the time of this writing):
$ npm install --save web3@0.20.6
Note that if you do not specify the version, npm will install the latest version of Web3.js (still in beta) and the dApp will not work.
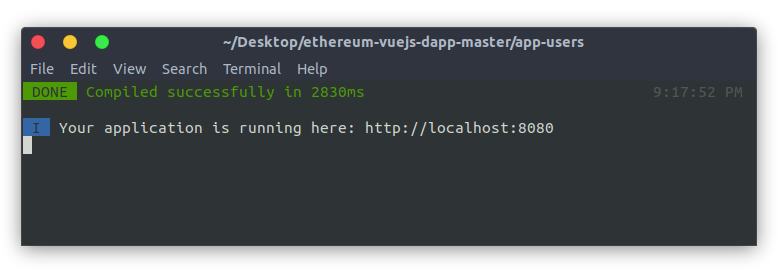
Finally let’s run the development server typing the following command in the project folder:
$ npm run dev
On the terminal you should see something like this:
Project set up and structure
Open the file index.html in the root folder app-users and paste the following CSS in the head section:
<link rel="stylesheet" href="https://maxcdn.bootstrapcdn.com/bootstrap/4.0.0/css/bootstrap.min.css" integrity="sha384-Gn5384xqQ1aoWXA+058RXPxPg6fy4IWvTNh0E263XmFcJlSAwiGgFAW/dAiS6JXm" crossorigin="anonymous">
<link rel="stylesheet" type="text/css" href=”/css/app.css">
The body has to include only the following tag:
<div id="app"></div>
The file index.html should look like this:
https://github.com/danielefavi/ethereum-vuejs-dapp/blob/master/app-users/index.html
The folder app-users/src contains the source of our project and now we are going to tweak it a little: delete the folder routes and create two folders called libs and views and finally create an empty file called routes.js.
In the PART 1 of the tutorial you deployed the smart contract Users.sol in the blockchain: now copy the file build/contracts/Users.json into the folder app-users/src/assets/.
The structure of the folder src should be like this:
- assets: contains the JSON configuration files like the compiled smart contract.
- components: Vue components folder.
- libs: contains classes and extra functionalities.
- views: pages components.
- App.vue: master page component.
- main.js: Vue bootstrap file.
- routes.js: URL / page view mapping.
The BcExplorer class: Web3.js made easy
Our dApp uses the class BcExplorer to handle the interactions with the blockchain; BcExplorer makes easy the use of Web3j.js.
With BcExplorer you can:
- Handle the connection.
- Initialize the multiple smart contracts.
- Call easily the functions from different smart contracts.
The class BcExplorer is located in the app-users/src/libs folder.
Note: the BcExplorer class works with the stable version of Web3.js 0.X but it does not work with the latest beta 1.x.
Let’s start with the project!
The file main.js is the bootstrap file of our dApp: the only line of code added here is:
window.Event = new Vue();
It will help to handle the cross-components events.
As you can see from the main.js, the first component that will be rendered is App.vue.
The main page app: App.vue
App.vue defines the structure of the pages with the menu on the top (TopMenu component) followed by the page content <router-view>.
The content page will be displayed only when the connection with the blockchain is established successfully (bcConnected is true) and no error occurred (bcConnectionError is false).
<div class="main-content" v-show="bcConnected && !bcConnectionError">
<router-view></router-view>
</div>
NOTE: you can be successfully connected to the blockchain but the address of the smart contract might be wrong; bcConnectionError is a variable which indicates if general errors occurred with the blockchain.
Where are bcConnected and bcConnectionError defined? Where are the functions that handle the connection with the blockchain?
If you check the script section of App.vue you will see that the mixin (click here to read mixin on Vue.js official documentation) mixinViews.js is included: bcConnected and bcConnectionError are declared here.
The mixin mixinViews.js
In the mixin libs/mixinViews.js are handled the set up of Web3.js and the initialization of the smart contracts; so all the components that use this mixin will initialize Web3.js and the smart contracts (if not initialized yet).
In the mixin you can see the declaration of the function created(): when a component includes this mixin, the code within the created() method in the mixin is mixed with the created() method of the component.
The function created() calls the method init(). Following you can see the code of the method init() in the mixin:
init() {
    // when this file is imported to other component it checks if the BcExplorer
    // is instatiated.
    if (window.bc == undefined) {
        window.bc = new BcExplorer;

        // connecting to the blockchain and intializing the Users smart contract
        window.bc.initWithContractJson(UsersContract, 'http://127.0.0.1:7545’)
        .then((error) => {
            // handling the connection error
            if (error) {
                this.bcConnected = false;
                this.showConnectionErrorMessage(error);
            } else {
                // calling a smart contract function in order to check the contract address
                // is correct. NOTE: here you might be connected successfully.
                this.isRegistered()
                .then(res => {
                    this.bcConnectionError = false;
                    this.bcConnected = this.blockchainIsConnected();
                })
                .catch(error => {
                    this.showConnectionErrorMessage(error);
                    this.bcSmartContractAddressError = true;
                });
            }
        })
        .catch(error => this.showConnectionErrorMessage(error));
    } // end if
},
The class BcExplorer is instantiated in window.bc so it can be accessed everywhere.
In case you are wondering why the initialization of BcExplorer and Web3.js is in a mixin and not in the main.js.
I will give an example: you have a dApp with 10 pages and only in 2 of them you are using Web3.js; since you need Web3.js in 2 pages only, you can initialize Web3.js in one of those two pages instead of doing it everywhere in the main.js, which also slows down the initial loading.
The TopMenu component
This component shows the top menu. You can find this component in src/components/TopMenu.vue.
The top menu shows:
- The link to the page of the status list.
- The link to the register page if the user is not registered yet or the link to the profile page if the user is registered.
- Message if the user is connected to the blockchain.

If you check the code of this component you will see it includes the mixin mixinViews. We need the BcExplorer functionalities because we have to check if the visitor is already registered and to show if the connection with the blockchain is established.
To show the message that the connection is established we can easily use the variable bcConnected defined in the mixin:
<strong :class="connectedClass">
{{ bcConnected ? 'Connected' : 'Not Connected' }}
</strong>
In the created method you can see that
Event.$on('userregistered', this.checkUntilUserIsRegistered);
this line of the code triggers the function checkUntilUserIsRegistered when the event userregistered is fired. The function checkUntilUserIsRegistered checks if the user is registered and it changes the link Register to Profile accordingly.
After the event userregistered is fired the function checkUntilUserIsRegistered checks every second if the user has been registered successfully calling function isRegistered (declarated in the mixinView.js):
isRegistered() {
    return new Promise((resolve, reject) => {
        window.bc.getMainAccount()
        .then(account => {
            window.bc.contract().isRegistered({ from: account }, (error, res) => {
                if (error) reject(error);

                resolve(res);
            });
        })
        .catch(error => reject(error));
    });
},
The function isRegistered() first gets the user’s account address calling the method getMainAccount(). That function returns the account address (don’t get confused with the coinbase address) through a promise. Once the promise from getMainAccount() is received the smart contract function isRegistered is called passing to it the account address as a parameter { from: account }.
The checking stops when the block is mined and so the user is actually registered.
This control must be done every second (and not only once) because the mining of the block needs time.
Let me explain it with an example: let’s suppose that your dApp uses a blockchain where the block mining is 5 minutes long; when a user signs up a transaction is submitted but it can take 5 minutes before the block is mined (so the user will be effectively registered).
If you are using Ganache the mining is instantaneous.
Another function in the created() method is called: checkUserIsRegistered.
This function changes the link from Register to Profile as well if the user is registered but the control is performed when the component is created.
This function has a timer too, that performs the check every half of a second, as connection to the blockchain can require some time; the checking stops when a response is received.
The view components
Let’s check the main functions used in the views.
How to get the users list on List.vue

In the file List.vue you can see all the status of the registered user. Below you can see the function that retrieves all the registered users:
getAllUsers(callback) {
    // getting the total number of users stored in the blockchain
    // calling the method totalUsers from the smart contract
    window.bc.contract().totalUsers((err, total) => {
        var tot = 0;
        if (total) tot = total.toNumber();

        if (tot > 0) {
            // getting the user one by one
            for (var i=1; i<=tot; i++) {
                window.bc.contract().getUserById.call(i, (error, userProfile) => {
                    callback(userProfile);
                });
            } // end for
        } // end if
    }); // end totalUsers call
}
This method first calls the smart contract function totalUsers to get the total number of users; then it gets all the users one by one calling the smart contract function getUserById starting with the user with ID 1 to the user with the ID returned by totalUsers function.
How to register a user profile

When the user is on the registration page (file Register.vue) and he presses the Register button the function performSubmit() is triggered. performSubmit() calls the function performUserRegistration() that performs the actual user registration:
performUserRegistration(address) {
    window.bc.contract().registerUser(
        this.userName,
        this.userStatus,
        {
            from: address,
            gas: 800000
        },
        (err, txHash) => {
            this.submitting = false;

            if (err) {
                this.showErrorMessage(err);
            }
            else {
                this.successMessage = true;

                // it emits a global event in order to update the top menu bar
                Event.$emit('userregistered’, txHash);

                // the transaction was submitted and the user will be redirected to the
                // profile page once the block will be mined
                this.redirectWhenBlockMined();
            }
        }
    )
},
As you can see, the smart contract function registerUser to register a user is called. The function must receive 3 parameters:
- The name of the user.
- The status the user.
-
An object with two attributes:
- from: the account address of the sender.
- gas: amount of gas you are willing to pay for this transaction.
If the registration is successful a global event userregistered will be fired:
Event.$emit('userregistered', txHash);
This event will be caught by the TopMenu component as described before.
Then redirectWhenBlockMined() is triggered: this method waits until the block is mined then it redirects the user to its own profile page_